Sunday, April 29, 2012

Garage Organization Part 2

A while back we posted about hanging the Rubbermaid Fast Tracks in the Garage to provide more storage. Here is Part 2 of that post, with all of them hung.

Remember, safety first.

Hanging the track


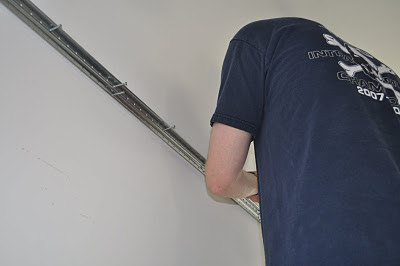
Finding the studs is the most important part since we are hanging very heavy items on the track.  Below is a photo of everything in place.  The bike, ladder, weed eater, and other yard tools are now hung up high and out of the way.

The garage, BEFORE:


AFTER:


We now have multiple tracks, each with various hooks for hanging items.  We also have two metal storage baskets (to the right of the window) and a shelving unit, hung from a track, for even more storage.  So far, we've been very happy with the Rubbermaid fast track system and would recommend it.  It is a great way to organize the garage and create more space.

Stay tuned for next week as we blog about our yard transformation.

Sunday, April 22, 2012

Pinterest inspiration

photo by natalie defnall

My small group recently threw a bridal shower for one of our members and his beautiful bride-to-be. The decor, food, and overall feel for the shower was inspired by what else, Pinterest! Neutral colors, burlap, and pops of turquoise blue filled the dessert table and surrounded the food. We all brought yummy desserts and side dishes and enjoyed burgers hot off J.T.'s grill.
I decided to combine one of my recent pins, with this pinterest-loving shower: yarn-wrapped wine bottles.

photo by natalie defnall

They looked easy enough on all of the various pins, but as I went along, I discovered they were not coming together quite as easily as I thought they would.

photo by natalie defnall

All of the pins I found suggested using hot glue as the adhesive for the yarn. Well, besides being very easy to burn yourself, hot glue dries quickly. I could only cover a couple times around the bottle with the yarn before another dab of glue was needed. All these dabs of glue resulted in a very bumpy appearance to the bottle.


It was also extremely difficult to get the rows of yarn close together since I was racing the clock, trying to finish as much as possible before the glue dried. This task was made more difficult since the yarn I was using was very small. I would recommend the thickest yarn possible for the next project.


With that first try a disaster, I moved on. I figured double sided tape would be a less stressful adhesive to try. We happened to have carpet tape from a previous project. This roll cost me about $5, and I didn't even use half of it for 3 bottles. It is super duper sticky. It will stick to you, glass, yarn, your clothes, the floor, everything...well not velvet, but that's another project.

Start with cleaning out the bottles and letting them dry (you can remove the labels but I didn't bother for all three of them).


Next, cover half and only half of the bottle in the carpet tape. It doesn't have to be completely covered, spaces are ok. You just want the yarn to touch some part of the adhesive during it's circle around the bottle.

This skein of yarn covered three bottles and probably could have covered at least three more! It cost me less than $3 with a coupon at JoAnn fabrics.

Now, start your yarn as close to the bottom as possible and begin to encircle the bottle.


And keep going around, keeping the yarn close together.


Now, cover the top half of the bottle. The hardest part is the neck, so don't get frustrated. Press the tape down with the backing and get it as flat as possible.

While gaps were ok on the bottom half of the bottle, try to keep the gaps in the adhesive to a minimum on this half. Keep wrapping...it's the most time-consuming part.

Almost done...add a drop of hot glue to the very top to finish it off and ensure it doesn't unravel.

Before and after (well, sort of). Red wine vs. white wine bottle.

I love how they turned out and they looked great at the shower. I'm sure this won't be the last post concerning pinterest!


Sunday, April 15, 2012

The Garden

One of the neat features about our neighborhood is that it offers resident's gardens. There are 6 beds, each with 4 spaces and roughly 250 square feet each. The areas have been tilled, fertilized, and have sprinkler systems throughout to water daily. We decided to test our skills this year and tempt the local deer population. So far, we've planted cantaloupe, watermelon, squash, green and red peppers, carrots, and okra. We also planted tomatoes and peppers in the back yard just in case the deer get too hungry.

I measured the fence surrounding all of the garden plots, and it's around 5 feet tall. According to a quick Google search, a 6 foot fence will not stop deer but a 7-8 foot fence will. Of the 6 beds (4 spaces in each), only 1 is surrounded with netting to keep the deer out. The lady in Row A said she didn't trust the deer and that they were especially bad last year. We initially were going to test our luck with the deer but after her convincing, we decided to put up 7 foot tall netting around our plot.

We'll update over the next few weeks, and hopefully, we can show large plants with fruits and vegetables, rather than nubs left by the deer and rabbits.

Sunday, April 8, 2012

Happy Easter

He is Risen!

Luke 24:1-8
1 On the first day of the week, very early in the morning, the women took the spices they had prepared and went to the tomb. 2 They found the stone rolled away from the tomb, 3 but when they entered, they did not find the body of the Lord Jesus. 4 While they were wondering about this, suddenly two men in clothes that gleamed like lightning stood beside them. 5 In their fright the women bowed down with their faces to the ground, but the men said to them, “Why do you look for the living among the dead? 6 He is not here; he has risen! Remember how he told you, while he was still with you in Galilee: 7 ‘The Son of Man must be delivered over to the hands of sinners, be crucified and on the third day be raised again.’8 Then they remembered his words.

Sunday, April 1, 2012

Bathroom Update

After showing you one of the upstairs bedrooms, I thought it was only fitting to show you its bathroom, too.
Before:
Notice there is no mirror above the sink.

(All the little signs state that the house has been winterized.)


After:
My pop of purple.

All of the photos are from my trips to Italy.


Glad to be finished painting this bathroom! Paint colors are Wet Pavement and Oatlands Violet, both by Valspar. Even though it wasn't a very large room, there was so much to paint around that the taping took forever. Still a couple things to do, but it is mostly complete. What do you think?